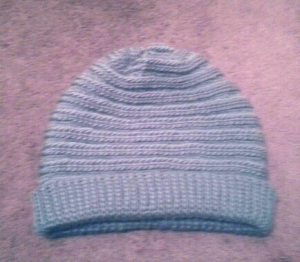
Big Worm is a big slouchy version of Worm on a Hook with a rolled up edging, and yes Friday is one of my favorite movies. Big Worm also has a 2 row rib instead of the 3 row rib in Worm on a Hook and more contrast between rows. I apologize in advance for using Slip Stitches for the ribbed edging. After making Doris Chan’s Sash-A belt for my Shannon cardigan a few years ago, I swore of Slip Stitches forever. A few days ago I started Shirley MacDonald’s Dappled Mitts and kept hating the technique, but loved the results. I tried several different types of ribbing for the edging of this hat and hands down the slip stitches worked the best. So… sorry.
Here’s the pattern for Big Worm:
Materials:
330 yards of worsted weight yarn (I used around 1.75 skeins of Vickie Howell Sheep(ish) )
J crochet hook (6.0 mm)
Tapestry Needle
Optional: Mechanical pencil with no lead or something else to pick up stitches, can use Tapestry Needle
Abbreviations:
BLO: Work in the Back Loop Only.
BBL: Work in the Back Back Loop only. This is the loop BEHIND the back loop.
Ch: Chain
DC: Double Crochet
DC2TOG in BBL: Double Crochet 2 Together in Back Back Loops
FHDC: Foundation Half Double Crochet
FLO: Front Loop Only
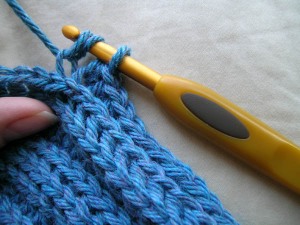
RHDC: Raised Half Double Crochet (special stitch). Similar to the Raised Single Crochet (photo tutorial available), but this is the Half Double Crochet version. YO, insert hook from back to front, under top two loops of stitch, then from front to back, under top two loops of next stitch. Hook will be around the post. YO, pull up a loop, YO, pull through all loops on hook.
RHDC2TOG: Raised Half Double Crochet 2 Together (special decrease stitch). YO, insert hook from back to front, under top two loops of stitch, then from front to back, under top two loops of next stitch. Hook will be around the post. YO, pull up a loop, YO, insert hook from back to front, under top two loops of stitch, then from front to back, under top two loops of next stitch. Hook will be around the post. YO, pull up a loop,YO, pull through all loops on hook.
SS: Slip Stitch
Video tutorials for the special stitches used in this pattern can now be found on the Crochet Video Tutorial page.
Pattern:
Body of Hat:
The body of the hat is worked in the round. You will be joining at the end of each round. Do not turn at the end of the round. First Ch 1 at the beginning of the round does not count as a stitch.
Round 1: Ch 2 (does not count as a stitch), 84 FHDC, then for final FHDC you will connect the foundation row. Make sure the foundation row is straight, put the two ends side by side, yo, insert hook into top two loops of chain of working side, then insert hook from the back to front of two loops of chain of the other side, yo, pull through both sides and pull up a loop, yo, pull through all loops on hook, ss to connect to top part of stitch. (85)
Round 2: Ch 1 (does not count as a stitch), RHDC in each stitch around, SS to connect to top of first stitch (85)
Round 3: Ch 1, DC in BBL of each stitch around, SS to connect to top of first stitch (85)
Round 4-19: Repeat Rounds 2-3 eight more times
Round 20: Repeat Round 2
Round 21: Ch 1, DC2Tog in BBL around to last stitch, DC in BBL for last stitch.
FO leaving long tail. Weave the tail in and out of each stitch of the last round and pull tight to close. Stitch a few stitches to secure and close up opening.
The body of the hat is done. Now for the edging.
Edging of hat:
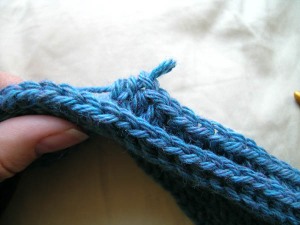
You will be turning at the end of each row. Be sure to count stitches as you go. It is easy to lose stitches if you don’t. Keep your tension VERY loose. You’ll want to use something to pick up the first and last stitches of each row. It will make life MUCH easier. I used the tip of a mechanical pencil with no lead. You can use the eyehole side of a yarn needle.
Row 1: With the right side facing you, join yarn in foundation row with a SS, Ch 15, turn. (15)
Row 2: Ch 1, SS in BLO of second Ch from hook, SS in BLO of each stitch, SS through both loops of foundation row, turn. (15)
Row 3: Skip SS in foundation row, SS in BLO of each stitch, turn. (15)
Row 4: Ch 1, SS in BLO of each stitch, SS through both loops of foundation row, turn. (15)
Row 5: Skip SS in foundation row, SS in BLO of each stitch, turn. (15)
Row 6: Ch 1, SS in BLO of each stitch, SS through both loops of foundation row for 2 stitches, turn. (15)
Row 7: Skip 2 SS in foundation row, SS in BLO of each stitch, turn. (15)
Row 8: Ch 1, SS in BLO of each stitch, SS through both loops of foundation row, turn. (15)
Repeat Rows 3-8 until you meet up with the beginning, ending with a SS into the foundation row.
For the final row that connects the two sides, hold the two right sides together, turn. SS through both sides of work, BLO on side facing you, FLO on other side, FO.
Weave in ends.
Please note this pattern is for personal use only. Please do not sell finished items from this pattern.


Sep 18, 2014 @ 22:21:47
Where is the decrease in the body? It seems it just continues with 85 stitches through round 20, and then one row with DC2Tog.
Also, I’m not familiar with these stitches – would it work to make one of the ridges in a different color?
I love the look, just started making it but with a chunky yarn I have, hope it turns out ok!
Sep 19, 2014 @ 22:48:43
Hi Sara
The decrease row is the row with DC2Tog.
Depending on what look you’re going for, ridges in a different color probably won’t work. Parts of one row will show through in another row, so if it’s a different color it will show through. Good luck with the chunky yarn.
Nina
Nov 15, 2014 @ 14:09:28
Is this in uk or us terms?
Nov 15, 2014 @ 15:08:07
US terms
Apr 03, 2015 @ 13:25:35
There’s gotta be something missing in the pattern. Twenty rows of the same stitch count and one row of decreasing is not going to created the rounded top that is shown in the picture. I followed your pattern and my hat has horns….
Apr 03, 2015 @ 22:21:56
Hi Beth
Did you see the line after round 21?
FO leaving long tail. Weave the tail in and out of each stitch of the last round and pull tight to close. Stitch a few stitches to secure and close up opening.
Mar 10, 2016 @ 14:05:33
Hi there! I made this beanie and I love it. Thank you!! The only thing I couldn’t figure out because this is a newer stitch for me is how to hide the seam. I know with regular crochet stitches, I can hide the seam by ss in the connecting stitch rather than the chain stitch. With this beanie/stitch, does anyone know how hide the seam as you make the beanie? Many many thanks!!
Apr 18, 2016 @ 20:56:07
Hi Jo,
Hmmm…I know Big Worm does have a visible connection. It didn’t bother me, so I never tried hiding it. Maybe next time I make one of the hats I’ll try out a few options. If you’ve found something that works, I’d love to hear it.
Thanks,
Nina
Jan 13, 2018 @ 13:22:39
Quick question, I was reading your directions for the RHDC and it seems to just be a BPHDC, am I right or did I completely misunderstand the directions?