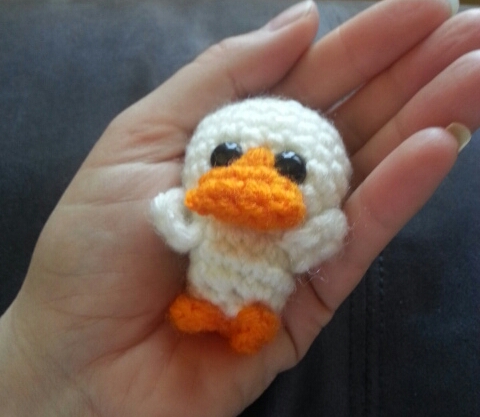
 The Ultra Mini Ugly – a teeny tiny lil duck is the smallest size Ugly. The little brother of A Lil Ugly, the Ultra Mini Ugly was also created for The Little Yellow Duck Project and works up in under an hour. I’m posting the Ugly patterns in three sizes as three separate patterns so that they are easier to read. A Lil Ugly (the next size up), was posted a few days ago. The full size Ugly pattern should be up in the next few days.
A Lil Ugly (left) and an Ultra Mini Ugly (right) for size comparison
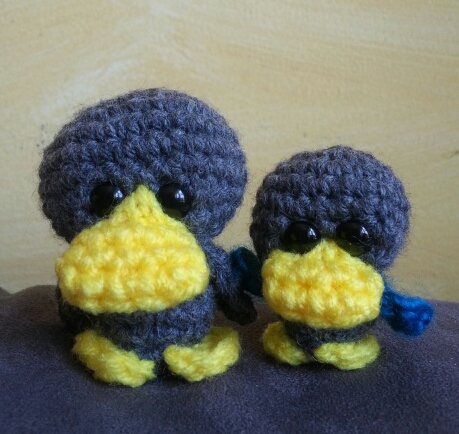
Exactly which worsted weight yarn you use makes a big difference in the final size. In the below picture of three different Ultra Mini Uglies, the one on the left is make in Red Heart Super Saver and came out the biggest. The other two use Red Heart Super Saver for the beak and feet only. The two grey ducks were made from ends of balls of yarn I had lying around and I’m not sure what yarn they were made from, but they were worsted weight yarns.
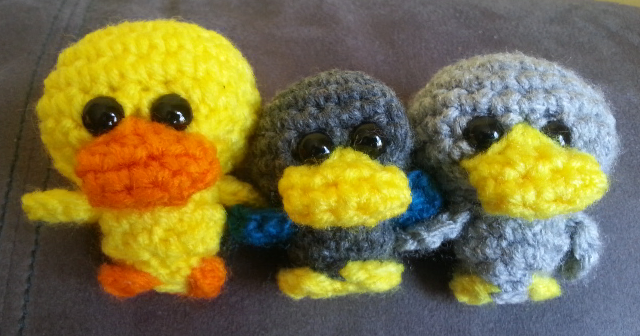
Three Ultra Mini Uglies in Different Types of Worsted Weight Yarn
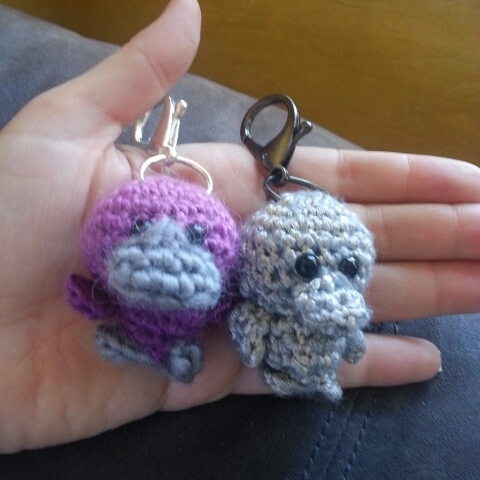
Even though they were made out of worsted weight yarn, some of the Ultra Mini Uglies I made were too small to be released in the wild with just a Little Yellow Duck tag attached so I added a jump ring and lobster claw which can be found in the jewelry findings section of a craft store. The metal of the ring was easy to bend open and closed with my bare hands and was not difficult to put on the duck. The clasps are fun because you can clip the duck onto gates or wire fences and you do not need to worry about the duck blowing away in the wind. I did add a warning to the LYD tags to remove the metal ring and clasp before giving to a child.
Materials:
A little worsted weight yarn in 2 colors.
6mm or 9mm black safety eyes
E crochet hook (3.5mm)
Tapestry Needle
Optional – large lobster claw and jump ring to use the Ugly as a key chain or bag clip
Abbreviations (US Terms):
CH: Chain
DC: Double Crochet
FSC: Foundation Single Crochet
dec: Single Crochet Decrease
FSC: Foundation Single Crochet
FLO: Front Loops Only
FSC: Foundation Single Crochet
HDC: Half Double Crochet
inc: Single Crochet Increase
SC: Single Crochet
SC3tog: Single Crochet 3 Together
SS: Slip Stitch
Notes:
This pattern is worked in continuous rounds.
Head and Body (make 1 start in main color):
Round 1: 6SC in magic circle (6)
Round 2: (SC, 4SC in next SC, SC) 2x (12)
Round 3: (inc, SC) 6x (18)
Round 4: (inc, 2SC) 6x (24)
Rounds 5-7: SC around (24)
Round 8: (SC, SC3tog, 3SC, SC3tog, 2SC) 2x (16)
Round 9: (SC, SC3tog) 4x (8)
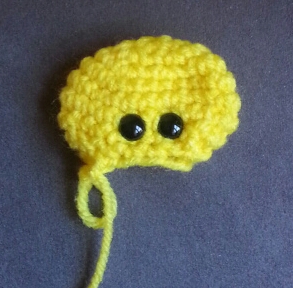 Flatten the head. Your working yarn will be on the left towards the front. Add plastic safety eyes between rows 7 and 8 1 sc apart.
Stuff
Round 10: SC around (8)
Round 11: inc around (16)
Rounds 12: SC around (16)
Round 13: dec around (8)
Round 14: dec (the dec should be in the front center, if it is not, SC until you get to the front center), change to contrasting color, FLO for the rest of the round: in the first stitch (SS, HDC) in the next stitch (DC, HDC), 2 SC, in the next stitch (DC, HDC)
Stuff
Round 15: Change back to main color, SC through both loops, 3 dec in unworked back loop from last round, FO leaving a long tail. (4)
Pull the loose end in contrasting color where the feet ended into the body and tie a knot with the other end of the yarn from the feet. Pull it into the body.
Weave tail from main color through final round and pull tight. Tie knot and pull into body.
Beak (make 1 in contrasting color):
Round 1: CH 1, 4 FSC, turn and SC up other side (8)
Round 2: HDC around (8)
FO leaving long tail
Sew beak onto head. I like to use 3 or 4 longer stitches between the eyes when sewing on the beak.
Wings (make 2 in main color):
You will be working on both sides of the chain.
CH 3, Turn, SC in second chain from hook, inc, continue to work up the other side of the chain working over your end, inc, inc (7)
SS into the first stich and FO
Pull both ends tight
Sew wings onto body.
You’re done!

Apr 30, 2015 @ 18:18:01
I’m really confused about step 14, could you possibly show a couple of pictures of how it should look at that stage so I can judge at what point I’m going wrong?? Thanks, Karen
May 04, 2015 @ 21:01:05
I was away over the weekend but will try to get a video or at least pictures up in the next few days
May 17, 2015 @ 15:23:36
Nina,
I just found your lovely patterns on Ravelry. Thank you so much for freely sharing your creativity and hard work!
May 18, 2015 @ 14:06:28
You are very welcome
Feb 16, 2023 @ 20:20:28
I am confused, I’m working on a crochet duck & the instructions read:
( Sc, SC3tog, 3sc,SC3 tog, 2 SC). 2x 16
I only count 12, what am I missing ?
Feb 17, 2023 @ 12:38:49
1 = SC
2 = SC3tog
3-5 = SC, SC, SC
6 = SC3tog
7-8 = SC, SC
Repeat all 8 again to make 16
Feb 17, 2023 @ 06:46:14
I am so confused on round 8, it says you should get 16 stitches & I only count 10, what am I missing