
For the past 2 weeks I’ve been more than a little obsessed with The Little Yellow Duck Project. I’ve been crocheting little ducks like crazy and my son, husband, and I have now placed 34 ducks in NYC, Long Island, and around Westchester County.
It’s ridiculously fun. Sneaking around. Trying to leave a duck in a super crowded place without being noticed. Eagerly checking The Little Yellow Duck Project’s world map to see if any new ducks have been reported. The rush when we’ve had another duck on the map. The amazement that our ducks were the first ones reported in NY state. The shouts of joy when we realized that the 500th duck reported was one we had left!

Ducks about to hit the streets of NY
My husband’s continued attempts have resulted in 0 of 14 ducks on the map. However, after leaving ducks on his coworker’s desks and discussing the project with them, he learned that one of them is about to donate a kidney in a few days. He didn’t feel it was right to push her to register it. She was doing more than her share for the cause.
So what is the cause? The Little Yellow Duck Project has two goals: to brighten up someone’s day by finding a little duck and to increase awareness and registration for organ, blood, and bone marrow donation. How is that personal? My friend Tania who I mentioned in my last post died earlier this year at the age of 41 while waiting for a heart transplant.

Little Yellow Duck with Tag
So what’s the deal with these ducks? There are a few official free patterns, but you can make any duck you like however you want to make it and stick a tag on it letting people know to take it home and that it’s part of The Little Yellow Duck Project with the website listed. I’ve used both the Just Ducky Lovey pattern and Filbert. Both are free patterns and work up in about an hour. I’ve found that Just Ducky Lovey is better for sticking in places, like slots of a bench if it’s windy. Filbert stands up and works great for flat places like picnic tables or the top of washing machines. The tags are available in multiple languages on the website and even include a place for you to name each duck.
While I’ve crocheted my ducks, there are also patterns for knitted and sewn ducks. People have also made ducks out of pom poms and have made bags with appliqued ducks on them.
This is an international initiative so no matter where you are, no matter what your medium, give it a shot. You just might make it on the map (and help to save a life in the process).

First Group of Ducks for The Little Yellow Duck Project
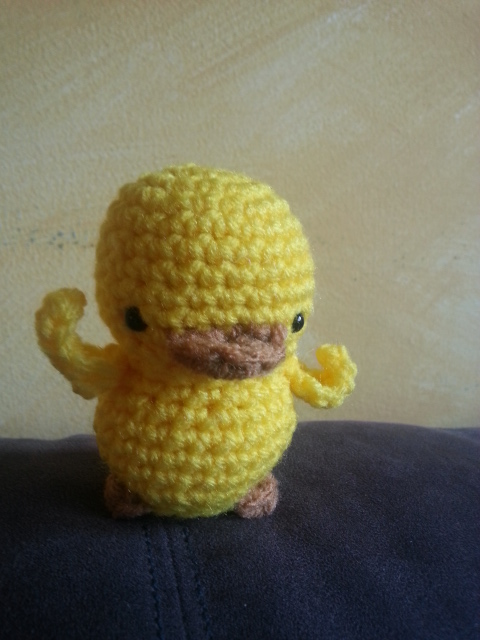
Filbert! as a Little Yellow Duck

Mallard variations of Just Ducky Lovey


