I finally gave Kristen Hein Strohm’s Fritillary Scarf a shot for Christmas presents. Reading through it made no sense, but when I finally sat down to make it, it worked out fine and made a gorgeous infinity scarf. I would highly recommend the pattern from Inside Crochet’s August 2011 issue available through Yudu. The pattern is for a flat scarf, but works very well in the round.
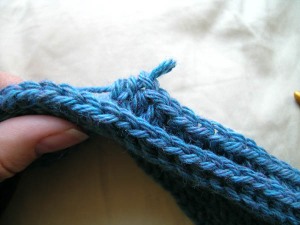
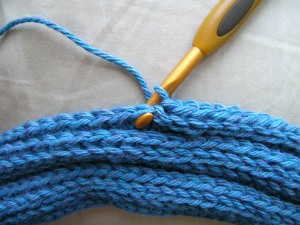
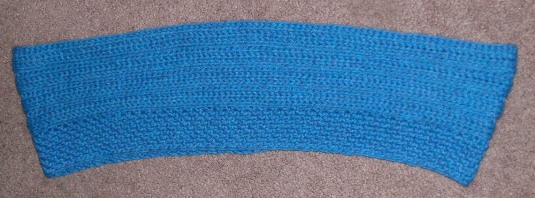
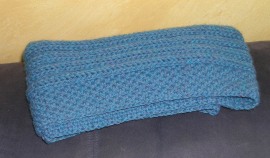
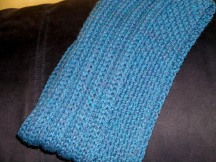
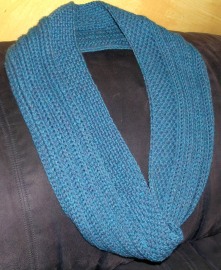
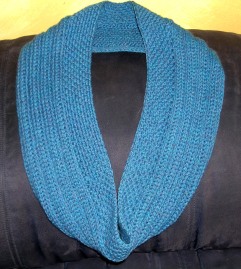
So while I was making these, I kept thinking how great it would work as just a ribbed cowl. New Year’s Eve I kept playing around with stitches and stitch patterns and while I wasn’t convinced just a ribbed cowl was the way to go, by New Year’s Day, my new infinity scarf Sugared Ribs was complete and I totally love how it came out. Sugared Ribs starts off with 4 shallow ribs (or faux ribs depending on your point of view), then ends with a few rows of seed stitch. I love ribbing and am always up to try a new crochet method. I really like how this ribbing came out. The rib rows take a while, but you’ll sprint through the final rows of seed stitch and the combo works great together.
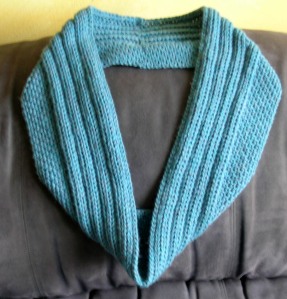
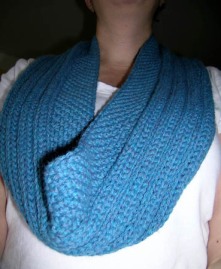
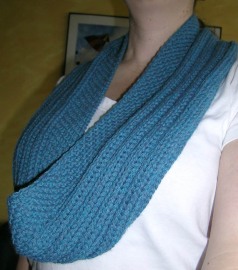
So here’s my New Year’s baby, Sugared Ribs – An Infinity Scarf:
Materials:
280 yards of worsted weight yarn (I used around 1.3 skeins of Berroco’s Vintage)
J crochet hook (6.0 mm)
Tapestry Needle
Abbreviations:
CH: Chain
CHSP: Chain Space
BBL: Work in the Back Back Loop only. This is the loop BEHIND the back loop.
FHDC: Foundation Half Double Crochet
HDC: Half Double Crochet
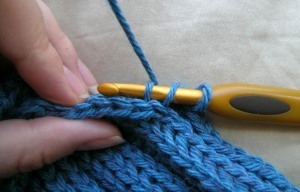
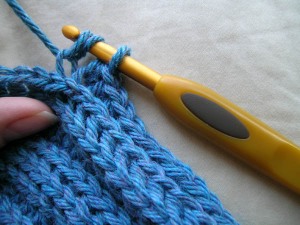
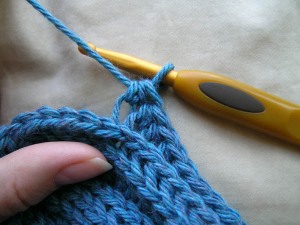
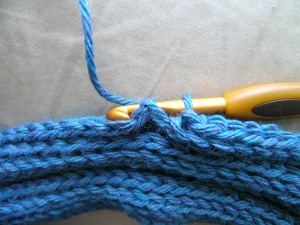
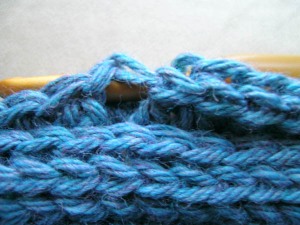
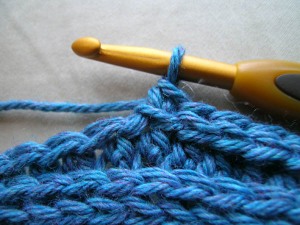
RSC: Raised Single Crochet (special stitch). After using this stitch in the Fritillary Scarf, I did some research to see if there was an official name for this stitch. While I found the stitch mentioned in a few places, I did not see it named anywhere else, so I’ve used the name from the Fritillary Scarf(if it was in American terms). This is similar to a back post stitch. Insert hook from back to front, under top two loops of stitch, then from front to back, under top two loops of next stitch. Hook will be around the post. YO, pull up a loop, YO, pull through both loops on hook.
RHDC: Raised Half Double Crochet (special stitch). Similar to the Raised Single Crochet, but this is the Half Double Crochet version. YO, insert hook from back to front, under top two loops of stitch, then from front to back, under top two loops of next stitch. Hook will be around the post. YO, pull up a loop, YO, pull through all loops on hook.
SC: Single Crochet
Video tutorials for the special stitches used in this pattern can now be found on the Crochet Video Tutorial page.
Notes:
This pattern is worked in the round, just keep going at the end of each row.
Pattern:
Row 1: Ch 3 (counts as first HDC), 173 FHDC, then for final FHDC you will connect the foundation row. Make sure the foundation row is straight, put the two ends side by side, yo, insert hook into top two loops of chain of working side, then insert hook from the back to front of two loops of chain of the other side, yo, pull through both sides and pull up a loop, yo, pull through all loops on hook, you do not need to ss to connect to top part of stitch, just continue on with the next row. (175)
Row 2: RSC in each stitch around (175)
Row 3: RHDC in each stitch around (175)
Row 4: HDC in BBL of each stitch around (175)
Rows 5-10: Repeat Rows 2-4 two more times
Rows 11-12: Repeat Rows 2 and 3
Row 13: SC in BBL of each stitch around (175)
Row 14: SC, CH 1 (skip 1 SC) (175)
Row 15: SC in CHSP, CH 1 (skip SC) (175)
Rows 16-22: Repeat Row 15
Weave in ends.
Variations:
Only want the ribs (aka Sugar Free Ribs)? Repeat rows 2-4 until it’s as wide as you want it. you may want to end with a row of SS or SC.
This length is long enough to double, but you can make it shorter or longer, just use an odd number of stitches.
Please note this pattern is for personal use only. Please do not sell finished items from this pattern.

Jan 18, 2012 @ 12:26:43
The pattern looks great and I’m excited to try it as it is probably one of the more complicated patterns I’ve done (I’m a somewhat-begginer ). I don’t know a lot about different types of yarns so do you think this pattern would work for a bulky and slightly fuzzy type of yarn (I have a bunch of Bernat Alpaca dark yarn lying around)?
Also, what was the finished length of your scarf?
thanks!
Jan 19, 2012 @ 07:49:20
Is that the Bernat Naturals Alpaca? I made a scarf in it last year and it was VERY scratchy to wear (and sheds all over everything). So soft to work with though. What a trick. Using a bulkier yarn, you’ll end up with a bigger scarf. You could probably start with 149 stitches, maybe even less. Your final scarf will be wider too. Wool will show the stitches better, but the Bernat Naturals Alpaca does have some stitch definition. I’m really not sure how it would work out. Give it a try and see how you like it. I’d love to see pictures and know how it goes. You may want to go up to a K hook so your stitches aren’t too tight. Hopefully working the BBL rounds won’t be too tough.
The finished size is 46″ x 5 1/4″. The measurement is from the longer side of the scarf.
After you connect your first row, determine if it is the length you want. If you want it longer, add more stitches in 2’s, if you want it shorter, have less stitches, in sets of 2’s.
Let me know if you have questions. The special stitches make it a little tricky.
Jan 19, 2012 @ 12:40:29
Yup, that’s the one, in the Ebony colour. I bought two skeins of it because it was so soft and I got an awesome deal on it. I tried a chunky cowl pattern with it (http://peoplewebs.blogspot.com/2011/01/pattern-chunky-circle-scarf.html) but ripped it all out after 6 rows because you couldn’t see the pattern very well (maybe because of the texture or the colour). I figured something ribbed might work better. I started out last night with a 6.5mm hook. I’ll try it for a bit and see how it goes and I’ll definitely post a picture of what I get.
Thanks for the help!
Jan 19, 2012 @ 18:21:50
If Sugared Ribs doesn’t work, I would recommend the Weave Scarf and there’s also the Weave Cowl.
Jan 19, 2012 @ 18:25:23
I just looked at the Chunky Circle Scarf pattern you tried. Yeah, that wouldn’t work well with the Bernat Naturals Alpaca. The Weave Scarf worked because it uses post stitches. It seemed to have just the right amount of stitch definition. The Chunky Circle Scarf would work better with a wool or an acrylic with good stitch definition.
Jan 22, 2012 @ 12:55:33
How can I get a printed verison of this pattern? I can’t carry a computer around with me while I am crocheting.
Jan 22, 2012 @ 14:15:19
You should be able to print the blog post.
Jul 05, 2012 @ 13:23:00
I just wanted to say how much I love your blog and that I have nominated you for an award here: http://craftgirl78.wordpress.com/2012/07/05/a-little-drop-of-sunshine/
Apr 09, 2013 @ 13:05:51
How many chains for the scarves?
Apr 09, 2013 @ 20:25:29
This infinity scarf uses the foundation half double crochet instead of the base chain and a row of half double crochet. You can start with Ch 176, connect, and start crocheting in the round with 175 HDC. I would highly recommend the foundation half double crochet over the base chain though.
Nov 06, 2013 @ 13:42:40
I’m having trouble connecting the foundation row. It’s ending up with a gap between the two ends, which is definitely not right. Is there a tutorial somewhere that shows how to connect the ends? Thanks!
Nov 27, 2014 @ 11:53:05
This is a lovely pattern. I’m old school when it comes to reading crochet patterns. I find the new way of reading patterns today kind of hard. I want to thank you for sharing this pattern and for the way you put it together. Well done! It was very easy for me to read your instructions. .
Nov 27, 2014 @ 16:28:00
I’m glad you like it. I know the stitches are unusual and was never sure if it was clear.
Dec 04, 2014 @ 18:11:07
Absolutely love this ribbing!! Gorgeous.
Dec 04, 2014 @ 21:38:34
Thank you. I’m glad you like it.
Dec 22, 2014 @ 21:39:31
How would I do this if I wanted a regular scarf instead of an infinity?
Dec 23, 2014 @ 05:31:09
This scarf is worked on the right side only so if you wanted a regular scarf instead of an infinity, you would need to cut your yarn at the end of each row and start again at the beginning of the row. Do not turn your work. You would either end up with a lot of ends to weave in or you could fringe the ends and include the ends in the fringe instead.
Jul 09, 2015 @ 08:13:00
complicated patterns I’ve done so ,you can exblan how mad by Possible clarification of the graph can be used to find out how stitch
Dec 20, 2015 @ 02:30:25
what is ss?
I’m having trouble connecting the foundation row. It’s ending up with a gap between the two ends, which is definitely not right. Is there a tutorial somewhere that shows how to connect the ends? Thanks
Dec 24, 2015 @ 20:32:48
SS is slip stitch
There is a video here to connect the ends